Dishonored 2 Safe Codes
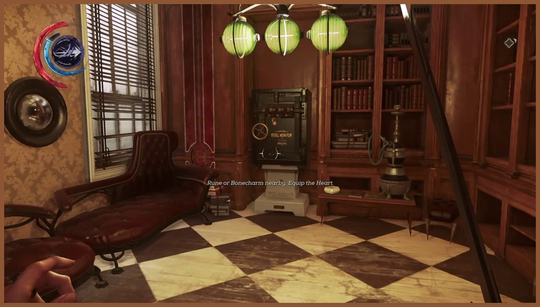
If you're looking to unlock safes in Dishonored 2, you're in luck! Safes are a great source of valuable rewards such as runes and bone charms. Although the locations of safes change with each playthrough, the safe codes themselves are never too far away.
Since the Dishonored 2 safe codes are randomized each playthrough, it can be a bit challenging to locate them. However, don't worry, as we have discovered some of them so far. If you're having trouble finding them, you can also refer to our Dishonored 2 runes guide for the locations of all the runes.
A Long Day In Dunwall
The first safe can be found in the mission titled "A Long Day In Dunwall." It is located in Doctor Galvani's apartment. To find it, head to her private study, which is just beyond her office. Look behind the painting and you'll discover a hidden room with the safe's code. Inside, you'll find two silver ingots, a pistol, and the Fabrication Market Owner's Sitter Draft note.
Edge Of The World
In the mission "Edge Of The World," make your way to Langston's lighthouse. Once you've cleared out the Overseer outpost, head to the third floor. Look for the safe in the room and check the blackboard nearby for the code. Inside the safe, you'll find the Bipartite Gargoyle Rune, two silver ingots, and a raw whalebone. Note that you can only find the rune and safes if you haven't killed anyone in the area.
The Winslow Safe Store
In the mission "The Winslow Safe Store," you'll find a safe code on a piece of parchment inside the cash register. Open up the safe to discover two silver ingots, one gold ingot, and a bone charm. This safe may be a bit harder to find because it's a more intricate safe that someone has left behind in the middle of a store robbery.
The Good Doctor
In the mission titled "The Good Doctor," head to the building on the far end of the disease treatment wing. You'll come across a destroyed room on the floor above, where you'll find a safe. Check the table beneath all the rubble for the safe code. Inside, you'll find a combat sleep dart formula blueprint and some copper wire.
The final safe in this mission can be found just before the end. Take a shortcut to the overseer's private room, which is a small room. Look underneath the keyhole for the oven on the wall to find the safe code. Inside the room, you'll discover Addermire Solution, Vasco's Journal, and Vasco's Lab Key.
The Clockwork Mansion
In the mission "The Clockwork Mansion," the safe is located on the second floor of the apartment building next to Aventa Station. You may not come across this safe during your first playthrough. After opening the safe, you'll find the gathering of the Regenters note, two silver ingots, and a lucky Sphalerite.
The Royal Conservatory
During the mission "The Royal Conservatory," a fast travel point will teleport you inside a condemned building opposite the Conservatory's main entrance. Enter the room, pop the fuse box, and head on up to the safe. The code for this safe can be purchased at the black market store or stolen from the Pinkerton's Presage Prone Part 4 note. Inside, you'll find five silver ingots, silver dust, a pistol, and ammunition.
A Crack In The Slab
In the mission "A Crack In The Slab," you'll find a safe earlier on. Head back to the furnace room in the past. In the present, this is the same area where you stealth kill the guard being lured by the songbird. Check the unhinged door for the safe code. Inside, you'll discover a bone charm, a silver ingot, Kono's Star Tables, and some coins.
Carlos' Apartment
Finally, there's a safe in Carlos' apartment on the third floor of his house. Look for the safe in a photograph of Carlos and open it to find a silver ingot, a gold ingot, and a pistol.
This safe is in the First Captain's office in the barrack's building on the first floor.


