How to build a gaming PC in 2023? The ultimate guide to building your own.
Building your own gaming PC can be a fun and rewarding experience, allowing you to customize your system to meet your specific gaming needs. Whether you’re a beginner or an experienced builder, our guide will get you ready to embark on your gaming PC journey.
Perhaps you’re looking to upgrade your current rig or you simply want to be able to play the best PC Games on the market right now. It’s not a cheap investment, but building your own gaming PC will allow you to get the most out of your money and squeeze every last drop of performance out of your chosen components. We’ve put together a comprehensive guide that will walk you through every step of the process, step by step.
The price range for a gaming PC can start from around $500 and go up to several thousand dollars, it ultimately depends on your budget and the level of performance you are looking for. Building your own PC lets you choose the parts that suit your needs, rather than being restricted to a gaming laptop or prebuilt console.
While there are many online guides on how to build a gaming PC, this will be specifically tailored to 2023, as technology continues to evolve each year. It’s also worth mentioning that investing more money into higher-quality components will result in better gaming performance and longevity.
Components
Step 1: Choose a case
While the case may not be the most important component when building your gaming PC, it’s one of the most important when it comes to actually putting the thing together. A poorly fitting case can make installing components a nightmare and could even damage your components if not done properly. So, it’s best to get this one right from the beginning.
There are many different cases on the market, but we’ve put together a list of the best gaming PC case options for 2023.
Step 2: Pick your components
Once you’ve chosen a case, it’s time to pick out the components that will go inside it. Building a gaming PC is like putting together a puzzle, but with a few extra steps. There are many online guides that can help you choose the right components, but we’ve done all the research for you and have picked out the best gaming PC components for 2023.
Step 3: Prepare your build
Now it’s time to get your hands a little bit dirty. This is the fun part, but also the most frustrating if you get stuck. Preparation is key to a successful build, so make sure you’ve gathered all the tools you’ll need beforehand. Check out our build tools list to make sure you have everything you need.
Step 4: Installing the CPU
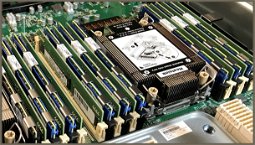
Before you can install any other components, you’ll need to install your CPU and CPU cooler. The CPU is the brain of your PC, so it’s worth investing in a good one, but if you’re on a budget, here is our guide on how to build a gaming PC on a budget.
Before installing the CPU, you’ll need to apply a small dab of thermal paste to the CPU’s heatsink. This is a very important step, as the heatsink will be in direct contact with the CPU’s heat spreader, so you don’t want it to be unevenly applied. To apply the thermal paste, you can use the little plastic applicator that comes with most thermal paste, or a small dab of the stuff on a clean piece of paper will do the trick.
The easiest way to install the heatsink is by placing it on top of the CPU, then lower your CPU into the motherboard. The CPU pins should automatically click into place. If they don’t, then make sure the heatsink is lined up correctly. You can do this by moving the heatsink around slightly until the CPU pins click into place.
Step 5: Installing your RAM
Installing RAM is one of the simplest steps in the build process, but it’s also important to get right. Your motherboard will only accept a specific type of RAM, so check your motherboard manual to make sure your RAM is compatible.
Step 6: Installing an M.2 NVMe SSD
Installing your M.2 NVMe SSD is pretty simple, but you do need to be careful about which direction you install it in, as it only fits one way. The side with the label should be facing towards the motherboard.
Step 7: Install your CPU cooler (Air)
Installing a CPU cooler is similar to installing a heatsink and fan, but you’ll need to attach the fan to the heatsink first. Then you can attach the heatsink to the CPU. Once again, the CPU pins should click into place automatically.
Step 8: Place your motherboard into the case
Now it’s time to put all the bits together. Place your motherboard into the case, then screw it into place.
Step 9: Prepare your Power Supply
Now it’s time to prepare your power supply. The power supply is the thing that will provide all the juice your components need and it’s typically one of the most expensive parts of your gaming PC. To prepare your power supply, you’ll need to connect the power cables from the power supply to the motherboard. The 24-pin cable connects to the motherboard at the top right, while the 8-pin cable connects to the motherboard at the top left.
Step 10: Install your CPU cooler (AIO)
Installing the AIO cooler is very similar to installing a CPU cooler, but the heatsink will already be attached to the water block. All you need to do is attach the water block to the CPU and the fans to the water block.
Step 11: Install your GPU
Installing your GPU is arguably the most important step, as it’s the part that will be responsible for all the fancy graphics. To install your GPU, you’ll need to attach the GPU to the PCI Express slot on the motherboard. It should click into place automatically, but if it doesn’t, make sure the GPU is lined up correctly.
Step 12: Install any extra fans or accessories
Installing any extra fans is fairly straightforward, but the same can’t be said for other accessories. There are many different gadgets and gizmos out there, but some are easier to install than others. You’ll need to check the instructions that come with your specific gadget to find out how to install it.
Step 13: Test boot
Before you start installing software, it’s a good idea to test if the motherboard is working and can boot up. To do this, simply insert the motherboard’s disc that came with it and follow the on-screen instructions.
Step 14: Install Windows & drivers
Installing Windows is pretty straightforward, but it’s also one of the most important steps. Make sure you have a Windows disc or USB stick ready and follow these instructions to install Windows. Once you’ve got Windows running, it’s time to install all your drivers, without drivers, your PC will be useless.
Step 15: Enjoy
And that’s it, you’re done. Now it’s time to sit back, relax, and enjoy your new gaming PC.
