Z Banding: Causes and Solutions
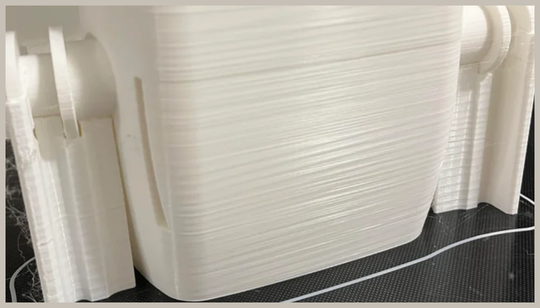
Exasperated by Z Banding in your 3D prints? Horizontal lines and ribs across the surface of your 3D printed objects are a surefire way to ruin a print. While Z banding doesn’t affect the structural integrity of a print, it does impact the visual appeal. We’ve got five ways to fix Z banding and improve your print quality, whether it’s caused by poor 3D printer settings, filament defects, or both.
There are a number of ways to get rid of Z banding, and many of the fixes are simple to implement. Check your 3D printer’s components and settings for loose or misaligned Z-axis parts, and tighten any loose screws or belts. If your Z axis is misaligned, you may need to adjust layer height in your 3D printer slicer to ensure consistent quality from layer to layer.
Poor quality 3D prints are often the result of inconsistent extrusion, so we’ve also included tips on how to improve extruder flow and temperature settings. Finally, ensure that your printer nozzle and any spare nozzles are clean, and your filament is stored correctly to avoid poor-quality prints.
Five Ways to Fix Z Banding in 3D Printing
If your Z axis is misaligned, it may be caused by loose screws, belts, or idler wheels. You should be able to resolve this by simply tightening any loose screws or belts.
If your printer uses belt-driven idler wheels, you may need to replace them with equivalent parts of the same size and type. Ensure that belts are in good condition and tightly fastened to the pulley wheels.
Consistent layer height should eliminate Z banding caused by misalignment. If you’re using a heated bed, enable a brim or skirt to help with adhesion.
If you’re using PLA, you may be able to get away with a lower layer height than usual. If you’re using a cooling fan, try reducing the fan speed to minimise Z banding.
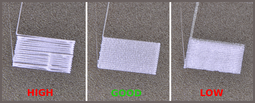
Correct extrusion settings are absolutely essential for avoiding Z banding. If your extrusion is inconsistent, you’ll get a staircase effect on the top surface of your 3D printed object, with each step corresponding to where extrusion was applied.
To improve extrusion consistency, clean your printer nozzle and make sure the flow rate and extrusion temperature are correct. You may also need to calibrate the E-steps to ensure correct filament extrusion.
Poor-quality filament can contribute to Z banding, so make sure you follow the manufacturer’s storage guidelines for your filament.
